Quick Tips
- Ascertain value of pennies before cleaning.
- How to clean copper pennies.
- Give your copper penny a good soak.
- Use some baking soda for a little extra shine.
- Give Lincoln a sponge bath and a proper drying.
- Cleaning zinc pennies.
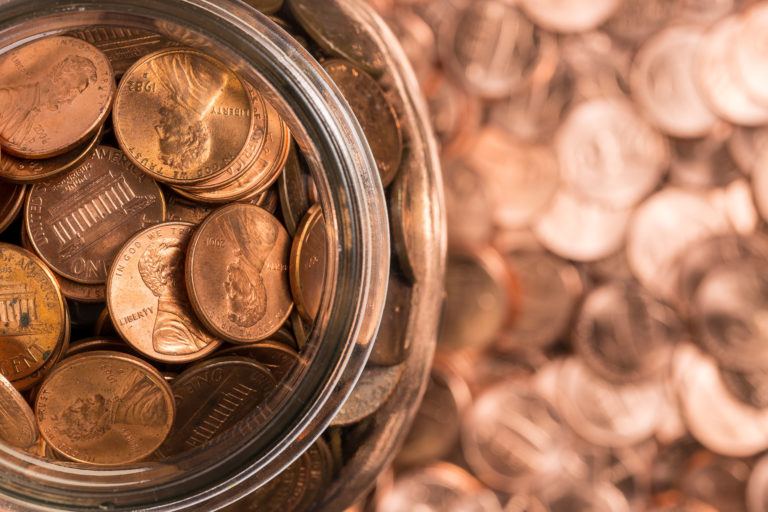
I’m a big geek. Proud to admit it too. I collect all sorts of dumb things: stamps, pennies, baseball cards, pennies, rocks, pennies, elephant figurines, pennies, Pez dispensers, and did I mention pennies? I have a huge penny collection. I credit this to the fact that I’ve been working in retail for the past . . . oh, I don’t know. . . 12 years or so. I’m the kind of guy that pisses other coin collectors off. Every time I open a new roll of coins, pennies especially, I look at every single one in search of the elusive wheat penny. Needless to say, I have jars of them. Granted, a good 30% of my wheat pennies are from 1957, but whadaya do? They’re all good.
Not every penny I own is a wheat penny. A lot of them are just good, old-fashioned copper pennies. I’ve actually got a pretty good stack of those blue Whitman Lincoln Cent Folder things (see right). You know what I’m talking about. So, yeah, a good portion of my pennies will never be worth more than a penny. Turns out, I don’t give a shit. I like ’em. The best thing about collecting them is how easy it is to clean pennies. I do have to mention here that if your penny is worth anything or you are not sure of its worth, don’t touch it. By cleaning it you will remove any “toning,” possibly scratch it up, and potentially reduce its value by up to 90%. Only clean pennies that have no more than face value. OK. Sorry ’bout the lecture. I’m now gonna teach you how to clean a penny. You’ll be pleased. Cleaning pennies is quick and easy, and the results are usually far better than expected.
How to Clean Old Pennies
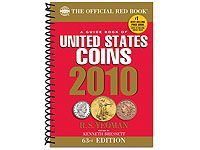 Ascertain value of pennies before cleaning. I know I’ve mentioned this already, but I really can’t stress the point enough. Some pennies are ridiculously valuable. You don’t want to mess them up. My favorite way of doing this is to purchase a current copy (values fluctuate) of The Official Red Book: A Guide Book of United States Coins. They’re only about fifteen bucks. Otherwise, don’t be afraid to take your pennies to a coin shop. Those folks will be happy to help. If you do this, do the right thing and buy something from them while you’re there. Perhaps a Red Book!
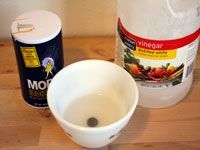 How to clean copper pennies. Cleaning pennies, as I’ve mentioned, is easy. Pennies minted prior to 1982 are primarily copper, usually about 95% with 5% zinc. To remove the oxidation from copper pennies, pour about a quarter cup of white vinegar in a glass or plastic bowl and mix in about a teaspoon of salt. Stir it up till the salt is dissolved, and then toss in your pennies. Only do a few at a time and make sure they’re not touching each other.
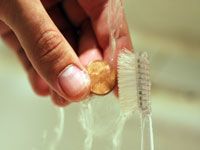 Give your copper penny a good soak. Once you’ve got your pennies soaking in your homemade penny cleaner, kick back for a few minutes. You’ll want to allow your pennies to soak for at least five minutes. If the oxidation is really bad or if there are some calcium deposits on them, allow them to sit longer. Use your judgement. Once sufficiently soaked, grab a soft toothbrush and give the penny a good once over. The toothbrush works well for getting in the crevices.
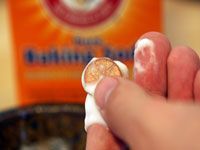 Use some baking soda for a little extra shine. You may be satisfied with the cleaning results after completing the previous step. However, if you want to give your penny a little extra lovin’, hit it with a little something extra. Grab a bowl and make a thick paste of baking soda and water. Smear a little bit of the baking soda paste on the penny and rub it in. You can do this with your fingers, but I would recommend using a microfiber cloth. You can always get Baking Soda from Amazon.
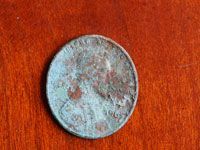
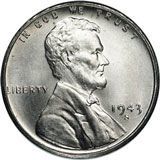
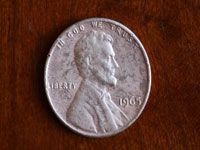 Give Lincoln a sponge bath and a proper drying. Alright, we’re almost there. The last thing you want to do is rinse all the crap off of the old guy’s face. This is to stop the chemical reaction between your cleaning substances and the copper. And for this all you gotta do is run it under some water. Make sure the plug is in the drain, hold the penny by the edges, and hold it under the stream. Once you’re satisfied, set the pennies on a towel to dry and prepare to bask in their shiny brilliance. Be sure to roll your cursor over the picture of the penny to the right to see the difference we’ve made.
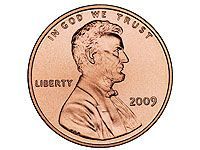 Cleaning zinc pennies. Zinc pennies are any pennies that were minted after 1982. Around this time, the value of copper had risen above the value of a penny, and so zinc became the main ingredient. Today’s pennies are only about 2.5% copper. The rest is zinc. The problem is that zinc doesn’t react as nicely with slight acids like vinegar. So, for your newer pennies, all you gotta do is grab a pencil with an eraser and start erasing. It’s kind of a pain in the ass, but it works. Otherwise, dilute your vinegar, and don’t soak the penny for as long.
Other Methods for Penny Cleaning
What you have read above is nothing more than my preferred method. I feel that it works the best, and since I’m somewhat anal about cleaning my coins, I go with it. However, there are many other methods for cleaning penny oxidation. The great thing is none of them involve scary chemicals. Yeah, you can buy things like Brasso, Tarnex, and Mr. Metal, and they will work very well. However, why not keep it green? There are so many other ways to clean coins and make ’em purdy.
Perhaps the most common suggestion is soaking your penny in hot sauce (Taco Bell, Tobasco, etc.). Sounds odd, but it works. Ketchup will do the same thing. For the method I went over in the middle section of this page, you can substitute lemon juice for vinegar. And who can forget about the good ol’ cola trick? Soak your penny in five-minute increments in the cola of your choice until the desired shine is achieved. For zinc pennies, some people will attach an eraser or buffing pad to a Dremel or a drill press.
More Penny Cleaning Info
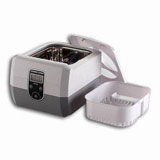 Professional coin cleaning.While you can buy your own, most coin shops have an ultrasonic coin cleaner on site that they will clean your coins in (for a price, of course). These cleaners clean by throwing sound waves at your coins in a water-filled tank. Pretty cool.
 Cleaning steel pennies. Perhaps the safest method for you and your steel penny is to just use a cotton swab and some olive oil. Soak your penny in a glass or plastic dish for a few minutes, remove the penny. and use a cotton swab to “roll” the dirt off of the penny. Do this by spinning the swab between your fingers as you move it across the coin’s surface. This will reduce, but not eliminate, scratching.
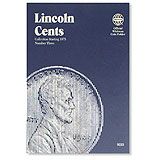 Whitman Lincoln Cents Folders.These are great for storing and organizing penny collections. Not only do they keep the pennies from rubbing against and marring each other, they’re also just kinda fun. They make it simple to see what pieces you still need for your penny collection. It’s also a good way to get your kids and grandkids interested. That’s how my grandpa got me going in the hobby.